SSH, keys and getting in safely
Generate an SSH key pair, copy it to a fresh Ubuntu server, and turn off password login for good, the first thing you do before anything else.

The moment a fresh Ubuntu server boots with a public IP address, bots are already trying to log into it. Not eventually, not if you're unlucky. Within minutes, automated scanners are hammering port 22 with usernames like root and admin and every password in every leaked breach list ever compiled. If your server accepts password logins, you're not defending against a targeted attacker. You're defending against a script that never sleeps, and passwords lose that fight eventually. SSH keys are how you take that fight off the table entirely.
What SSH actually gives you
SSH (Secure Shell) is how you get a terminal on a remote machine, encrypted, over the network. When you run ssh sam@203.0.113.10, you're opening an encrypted channel to that server and starting a shell session on it, as if you'd plugged in a keyboard and monitor directly. Everything you type from that point runs on the server, not your laptop.
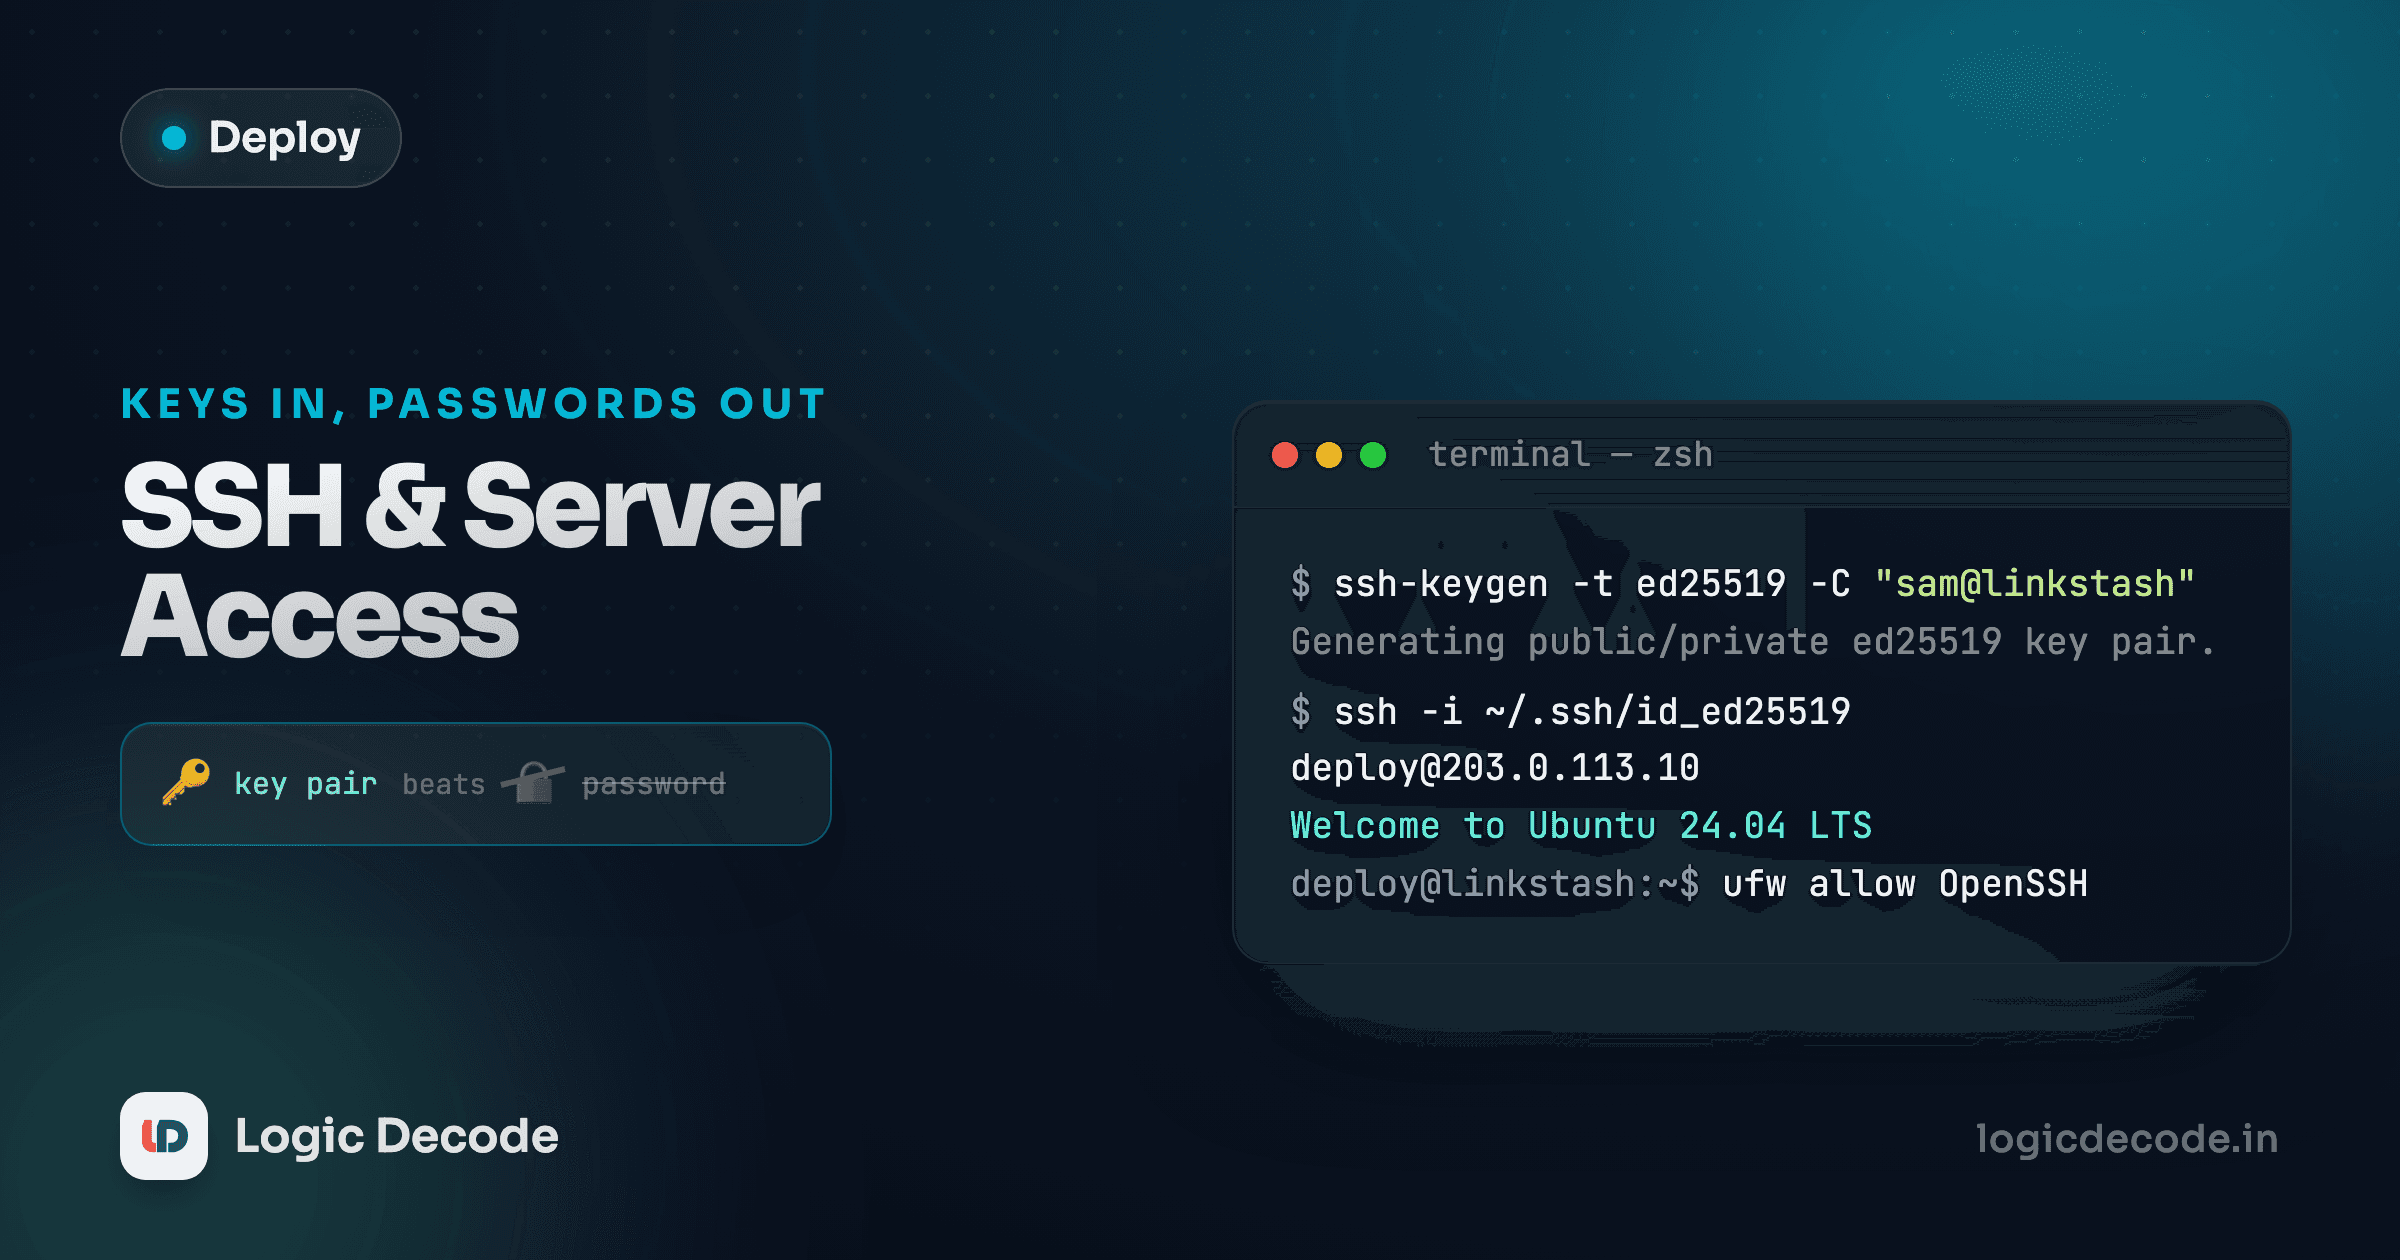
Authenticating with a password means the server has to receive that password over the connection and check it. It works, but it's guessable, phishable, and reusable if it leaks somewhere else. A key pair replaces "prove you know a secret string" with "prove you hold a specific private key," which is a much harder thing to steal or brute-force. Let's set that up.
Generating a key pair
Do this on your own laptop, not the server. A key pair is two files: a private key that never leaves your machine, and a public key you can hand out freely.
ssh-keygen -t ed25519 -C "sam@laptop"-t ed25519 picks the Ed25519 algorithm: modern, fast, and shorter than an equivalent-strength RSA key. -C is just a comment to help you tell keys apart later, usually your email or a label. Accept the default file location (~/.ssh/id_ed25519) unless you already have a key there. When it asks for a passphrase, use one. That passphrase encrypts the private key file on disk, so if your laptop is ever stolen, the key alone isn't enough to use it.
You now have two files:
ls ~/.ssh/id_ed25519*/home/sam/.ssh/id_ed25519
/home/sam/.ssh/id_ed25519.pubThe one without .pub is private. Never send it anywhere, never paste it into a chat, never commit it. The .pub file is the one you share.
Private means private
If a private key file ever leaves your machine, whether by email, a public repo, or a compromised laptop, treat every server it can access as compromised too. Generate a new pair and remove the old public key from every server's authorized_keys file.
Copying your public key to the server
Your cloud provider almost certainly let you paste a public key when you created the server, which is the easiest path and worth doing at creation time. If you're adding a key to a server that only has password login so far, ssh-copy-id does it in one command:
ssh-copy-id sam@203.0.113.10It'll ask for the server's password one last time, then appends your public key to ~/.ssh/authorized_keys on the server for that user. If ssh-copy-id isn't available, the manual version is the same idea:
cat ~/.ssh/id_ed25519.pub | ssh sam@203.0.113.10 "mkdir -p ~/.ssh && cat >> ~/.ssh/authorized_keys"Now test it in a fresh terminal, without closing the one you're already connected on:
ssh sam@203.0.113.10You should land in a shell with no password prompt, just your key's passphrase if you set one (and your local ssh-agent will usually cache that after the first unlock). Keep that first terminal open until this works. If you lock yourself out with no working session left, most providers offer a browser-based console as a recovery path, but it's a hassle you want to avoid.
Turning off password login
With key login confirmed working, disable passwords entirely so the bots hammering port 22 have nothing to guess. Edit the SSH daemon's config:
sudo nano /etc/ssh/sshd_configFind and set these three lines (add them if they're missing, and remove any # comment marker in front):
PasswordAuthentication no
PermitRootLogin no
PubkeyAuthentication yes
PasswordAuthentication no is the main event: it rejects password logins for every user, key or nothing. PermitRootLogin no stops anyone from logging straight in as root, which pairs with the non-root user you'll create in the next lesson. PubkeyAuthentication yes is usually already the default, but setting it explicitly makes the intent unambiguous.
Restart the SSH service to apply it:
sudo systemctl restart sshTest before you disconnect
Restarting the SSH service does not drop your current session, but don't close it yet. Open a brand new terminal and confirm ssh sam@203.0.113.10 still logs you in, and that ssh sam@203.0.113.10 with a deliberately wrong key or -o PubkeyAuthentication=no gets rejected. Only close your original session once a fresh key-based login is confirmed working end to end.
A couple of habits worth building now
Typing the full ssh user@ip every time gets old fast. An SSH config entry fixes that:
Host linkstash
    HostName 203.0.113.10
    User sam
    IdentityFile ~/.ssh/id_ed25519
From then on, ssh linkstash is the whole command. This same alias also works with scp and the rsync commands you'll use later in the series to move files to the server, and it pairs well with the automation habits from shell scripting basics once you're doing this on more than one server.
Quick check
Why does an SSH key pair beat a password against automated login attacks?
You're in, and the door only opens for people holding the right key. Next: users, groups and permissions, where you stop doing everything as root and set up the account that will actually run Linkstash.

Written by
Rhythm Bhiwani
Engineer and relentless builder, happiest reverse-engineering hard problems until they click.
Enjoyed this?
Tap the heart to leave some love.
Be the first to react
Comments
Join the conversation.
Loading comments…