Docker Ports and Volumes, Explained
Reach into a container and keep its data: map ports with -p so you can hit the app, and use volumes so data survives a container being removed.

You start a container running a web server, the logs say it's listening on port 80, you open http://localhost:80 in your browser, and you get nothing. Connection refused. The server's fine. The problem is that a container is a sealed box. By default, nothing inside it is reachable from your machine, and nothing it writes to disk survives the container being deleted. This lesson is about poking two deliberate holes in that box: a port so you can reach the app, and a volume so its data outlives it.
A container is isolated on purpose
That isolation isn't a bug, it's the whole pitch. A container gets its own filesystem, its own process tree, and its own private network. Two containers can both run a server on port 80 and never collide, because each one thinks it owns the entire port 80 inside its own little world. Your laptop's port 80 is a completely separate thing.
So when a container "listens on port 80," it's listening on its own port 80, sealed off from yours. And when it writes a file, that file lives on its own throwaway filesystem. Great for keeping things tidy and conflict-free. Annoying the moment you actually want to use the app or keep its data. The fix for each is one flag.
Publishing a port with -p
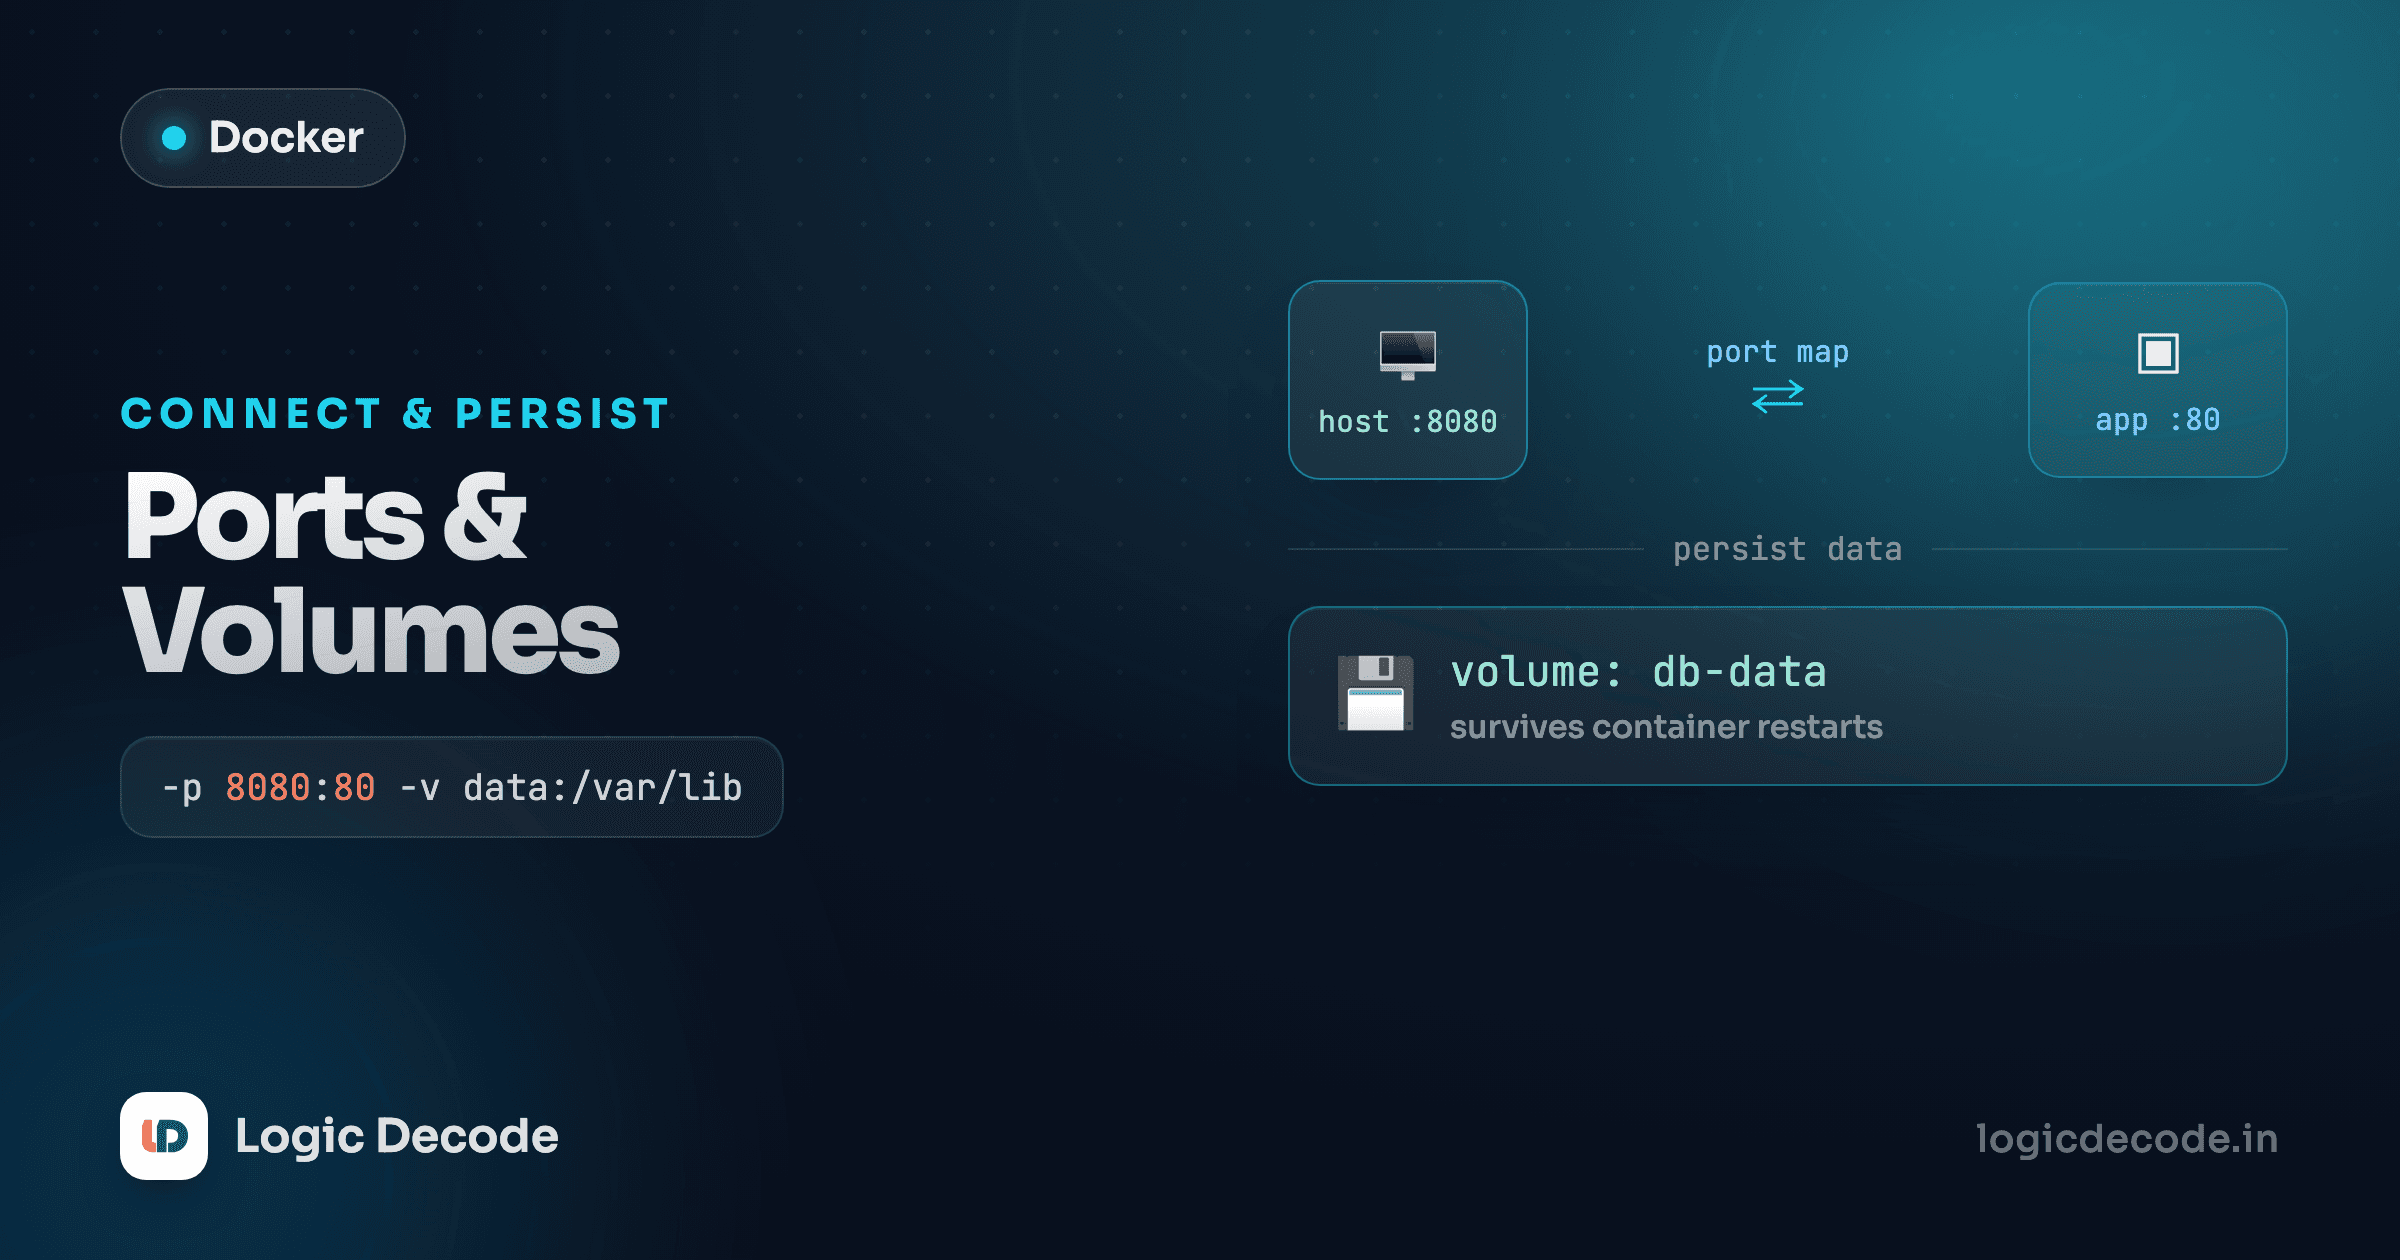
To reach a container's port from your machine, you publish it. The flag is -p hostPort:containerPort, and it builds a bridge from a port on your laptop to a port inside the container.
docker run -p 8080:80 nginxRead the 8080:80 left to right as host first, container second. Traffic that hits port 8080 on your machine gets forwarded to port 80 inside the container, where nginx is listening. Open http://localhost:8080 and you'll see the nginx welcome page. The container never changed. Nginx is still on port 80 internally. You just wired your 8080 to its 80.
The two numbers don't have to match, and that's the point. Already got something on 8080? Put this one elsewhere by changing the host side. -p 3000:80 makes nginx reachable at http://localhost:3000 while it still listens on its own port 80 inside. The host number is yours to choose. The container number has to match whatever the app inside actually listens on. Get the order backwards (-p 80:8080) and you'll forward your port 80 to a container port nothing's listening on. Connection refused, and you'll waste ten minutes before you spot it.
Host first, container second
The mnemonic that sticks: -p reads outside-in. The number nearest the dash is the one you type in your browser. The number after the colon is where the app lives inside. -p 8080:80 means "my 8080 reaches their 80."
Quick check
You run `docker run -p 5000:80 nginx`. Which URL shows the nginx page?
Why a container's filesystem is throwaway
Now the data problem. A container's filesystem is built from its image plus a thin writable layer on top. Anything the app writes (log files, an uploaded image, a database's rows) goes into that writable layer. And that layer is born with the container and dies with it.
Watch it happen. Start a container, write a file inside it, then remove the container:
docker run --name temp -it ubuntu bash
# inside the container:
echo "important notes" > /data.txt
cat /data.txt          # important notes
exit
docker rm temp         # the container — and /data.txt — are gone
The file existed, you read it back, and the instant you docker rm the container it's gone for good. There's no recovering it. This is fine for a stateless web server you can rebuild from the image in seconds. It is a disaster for a database. Run Postgres in a plain container, docker rm it, and you've deleted every row your app ever stored.
The fix is to stop writing important data into that throwaway layer and write it to a volume instead, storage that Docker manages outside the container's lifecycle.
Named volumes for data that must survive
A named volume is a chunk of storage with a name, managed by Docker, that lives independently of any container. Containers come and go. The volume stays. You attach one with -v volumeName:/path/inside/container.
The classic case is a database. Here's Postgres, told to keep its data in a named volume called pgdata:
docker run -d --name db \
  -e POSTGRES_PASSWORD=secret \
  -v pgdata:/var/lib/postgresql/data \
  postgres
Postgres writes everything to /var/lib/postgresql/data inside the container, but that path is now backed by the pgdata volume on your host, not the container's disposable layer. docker rm -f db and start a fresh container pointing at the same pgdata, and every table is still there.
Docker creates the volume automatically the first time you name it, but you can manage them by hand too. These are the four you'll actually use:
docker volume create pgdata     # make one explicitly
docker volume ls                # list all volumes
docker volume inspect pgdata    # where it lives, when created, etc.
docker volume rm pgdata         # delete it (and its data — careful)
The container is disposable, the volume is not
docker rm deletes a container, not the volumes attached to it. That's the whole point, your data is safe. But docker volume rm pgdata does delete the data, permanently. And docker volume prune sweeps away every volume not currently attached to a container, which can quietly take a database with it. Know which command you're running.
Bind mounts for live-editing code in dev
There's a second flavor of -v that looks similar but does something different. A bind mount maps a real folder on your machine straight into the container. Instead of a Docker-managed name on the left, you give an actual host path:
docker run -p 3000:3000 -v $(pwd):/app node-dev$(pwd) is your current directory, so this mounts the folder you're standing in onto /app inside the container. Now the container sees your real source files, and because it's a live link, editing index.js in your editor changes the file the container sees instantly. Pair that with a dev server that watches for changes and you get hot reload inside a container: edit on your host, the app restarts inside the box. No rebuilding the image for every keystroke.
The direction here matters. A named volume is storage Docker owns, made to persist the container's output. A bind mount is your folder, projected in, so the two stay in sync. Same -v flag, opposite intent.
Volumes vs bind mounts: when each
They share syntax, so it's easy to blur them, but they're for different jobs:
- Named volume (
-v pgdata:/var/lib/postgresql/data). Docker manages the storage and where it physically lives. Best for data the app produces that must survive: database files, uploads, caches. Portable, backed up as a unit, doesn't care about your host's folder layout. - Bind mount (
-v $(pwd):/app). You point at an exact folder on your machine. Best for development, where you want your live code visible inside the container and changes reflected immediately. Tied to your host's paths, which is exactly why it's a dev tool, not a production one.
Rule of thumb: if the container is producing data you want to keep, reach for a named volume. If you're feeding your own files in to work on them, that's a bind mount. Databases get volumes. Your code-in-progress gets a bind mount. For the gory details and edge cases, the Docker volumes docs are the authoritative source.
Quick check
You're running a Postgres container and want the data to survive being removed and recreated. Which flag fits best?
The takeaway
A container is sealed by default: its ports are private and its filesystem is throwaway. You open it up deliberately, one flag at a time. -p hostPort:containerPort publishes a port so you can reach the app from your machine, host on the left, container on the right. -v handles storage, in two modes: a named volume (-v pgdata:/data) for data the app produces and you can't afford to lose, and a bind mount (-v $(pwd):/app) for projecting your live code in during development. Remove the container and the named volume stays. That's the whole reason it exists.
This built on Layers and caching, where you saw how an image is stacked from read-only layers, the same layer model that makes a container's writable top layer disposable. Next we connect containers to each other and to the wider world: Environment and networking, covering env vars and how containers find and talk to each other.

Written by
Rhythm Bhiwani
Engineer and relentless builder, happiest reverse-engineering hard problems until they click.
Enjoyed this?
Tap the heart to leave some love.
Be the first to react
Comments
Join the conversation.
Loading comments…