Dockerfile Basics: Build Your Own Image
Write a Dockerfile from scratch: FROM, WORKDIR, COPY, RUN, EXPOSE and CMD, then docker build your own image and run it. Package a real app step by step.

So far you've run images other people built. Now you build your own. The thing that turns your code into an image is a plain text file called a Dockerfile, a list of steps Docker follows to assemble everything your app needs into one shippable image. By the end of this lesson you'll have written one for a small web app, run docker build, and watched your own image start up in a container.
A Dockerfile is a recipe
Think of a Dockerfile as a recipe and the image as the finished dish. Each line is one instruction: start from this base, set up this folder, copy these files in, run this install command, expose this port, start with this command. Docker reads the file top to bottom and runs each step, and what comes out the other end is an image you can run anywhere Docker runs.
The file is literally named Dockerfile, no extension, and it sits in the root of your project next to your code. That's the convention docker build expects. You can name it something else and point Docker at it with a flag, but don't. Dockerfile is what everyone looks for.
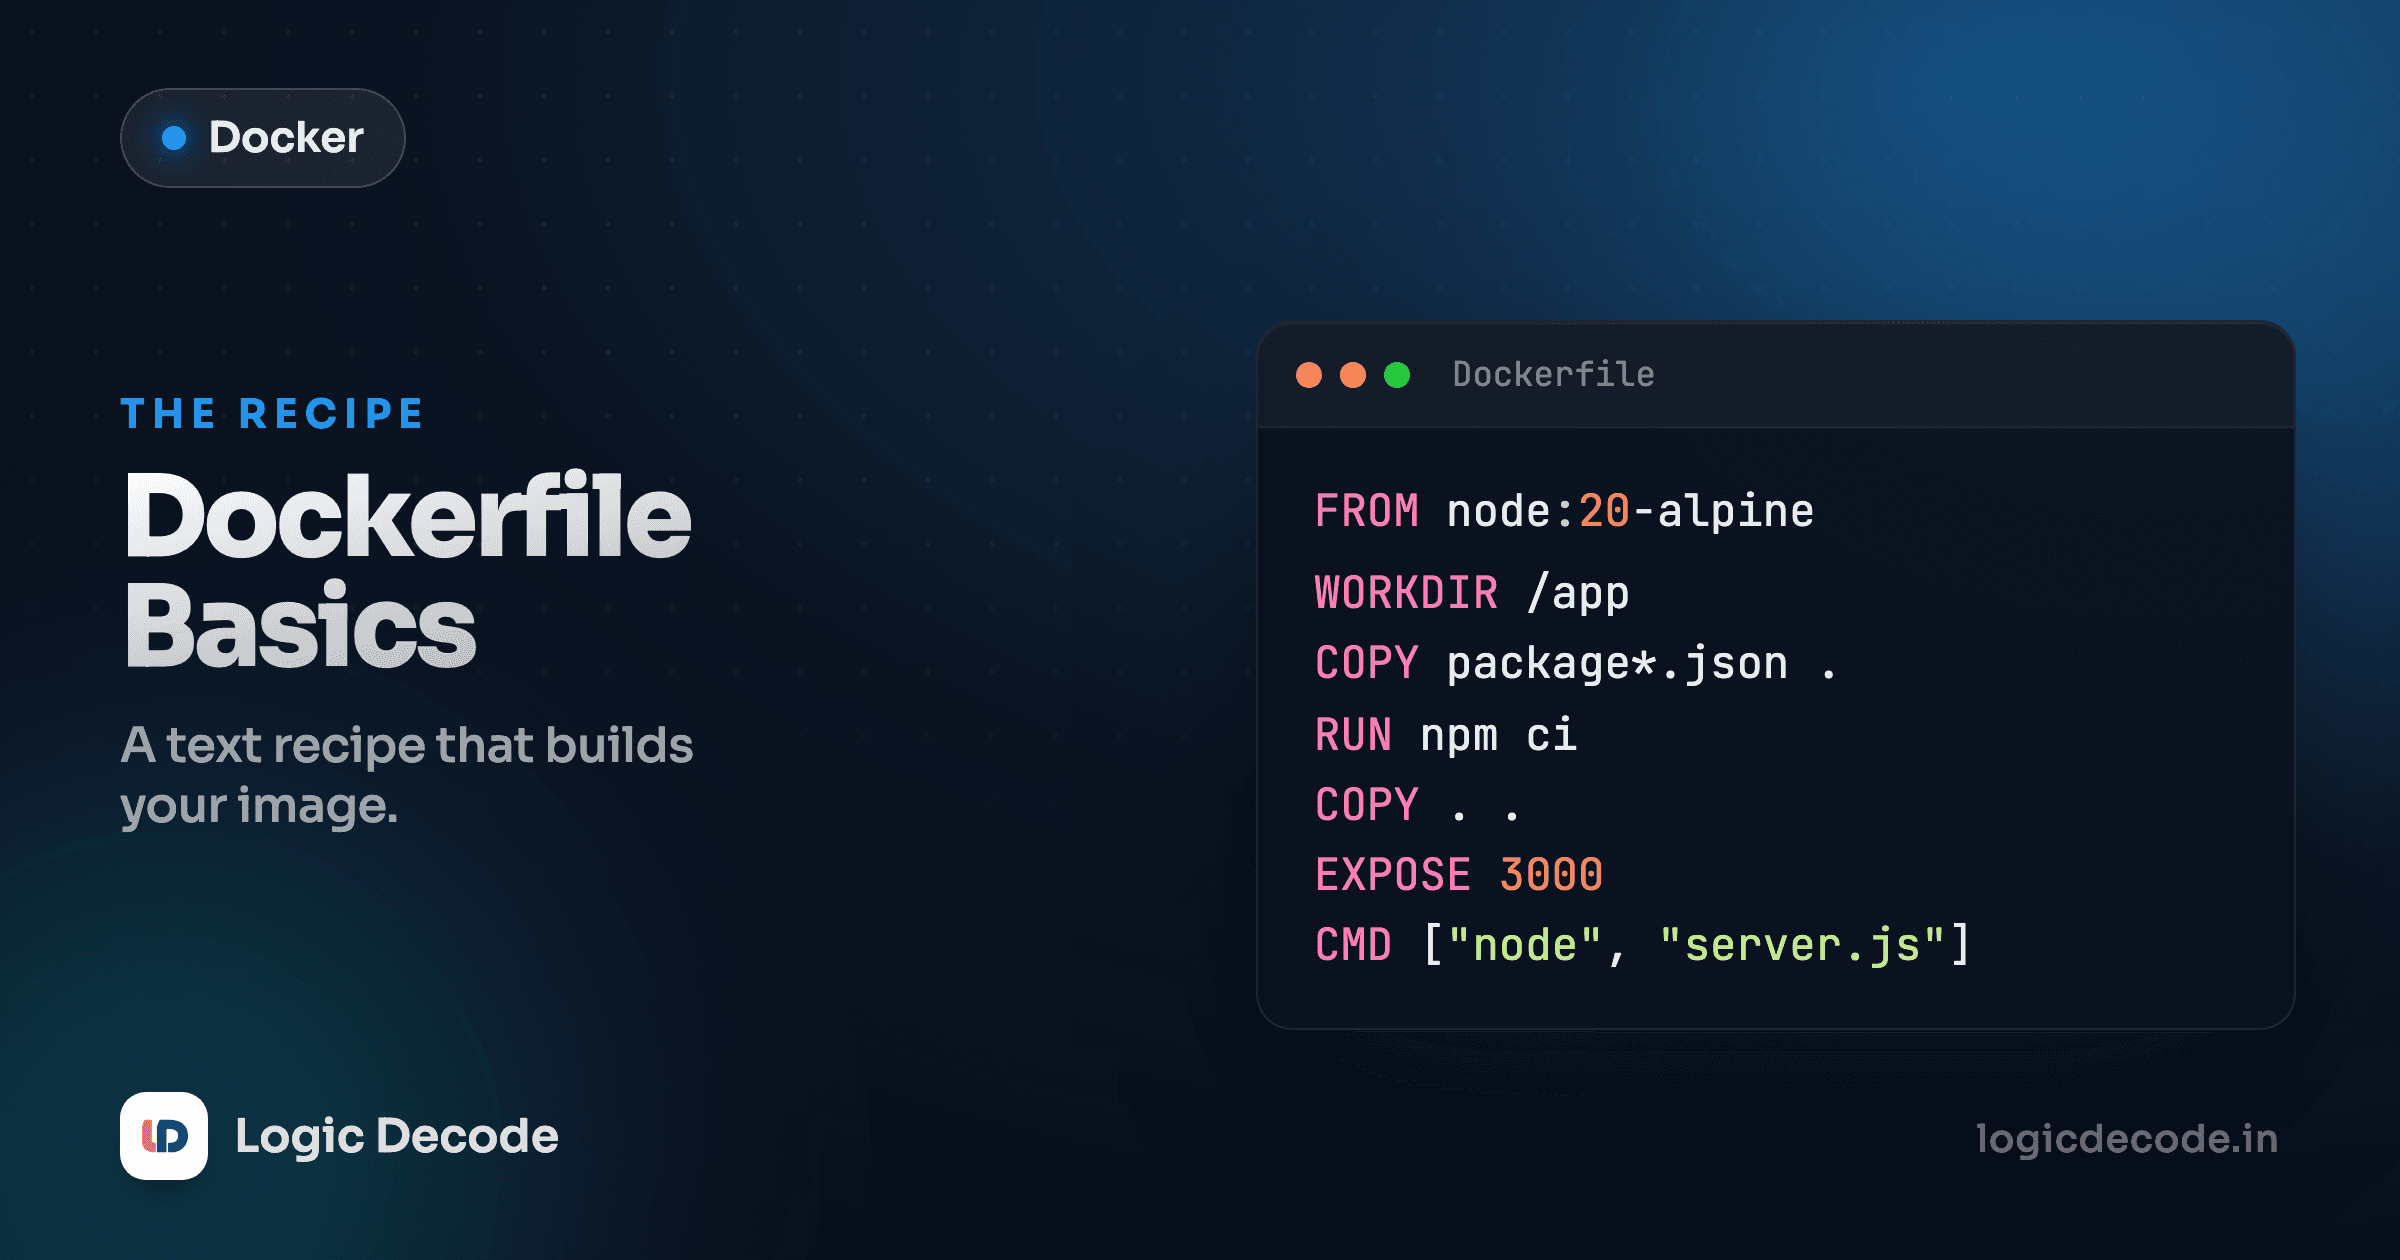
Here's the whole shape before we break it down. This is for a tiny Node app, but the structure is the same idea in any language:
FROM node:20-alpine
WORKDIR /app
COPY package.json package-lock.json ./
RUN npm install
COPY . .
EXPOSE 3000
CMD ["node", "server.js"]
Seven lines, and that's a complete, working image. Let's go through them one at a time, because every line is earning its place.
The app we're packaging
To keep this concrete, here's the app those lines are wrapping. A minimal HTTP server with no dependencies beyond Node itself:
const http = require("http");

const server = http.createServer((req, res) => {
  res.writeHead(200, { "Content-Type": "text/plain" });
  res.end("Hello from inside a container\n");
});

server.listen(3000, () => {
  console.log("Listening on port 3000");
});
It answers every request with one line of text on port 3000. Tiny on purpose, since the point is the packaging, not the app. The rest of this lesson turns this file (plus its package.json) into a runnable image.
FROM: start from a base
FROM node:20-alpineEvery Dockerfile starts with FROM. You're almost never building an image from literally nothing. You start from one that already has what you need. node:20-alpine is an official image with Node 20 already installed on top of Alpine Linux, a tiny distro that keeps the image small. Without FROM, Docker has no operating system, no runtime, nothing to build on.
Picking the base is a real decision. node:20 would also work but pulls in a full Debian system, a bigger download with more stuff you don't need. alpine variants are the lean default for most apps. If you were packaging Python you'd reach for python:3.12-slim, and for a static site, maybe nginx:alpine. The base sets the floor for everything that follows.
WORKDIR: pick a working folder
WORKDIR /appWORKDIR sets the directory that the rest of the instructions run in, and that your app runs in when the container starts. It's like running cd /app, except it also creates the folder if it doesn't exist. From this line on, COPY and RUN happen relative to /app.
You could skip it and dump everything in the root of the filesystem, but don't. A dedicated /app folder keeps your code separate from the OS's own files, and every Dockerfile you read uses this convention. Set it once, near the top.
COPY and RUN: dependencies before source
This is the part people get wrong, so look closely at the order:
COPY package.json package-lock.json ./
RUN npm install
COPY . .
COPY moves files from your machine into the image. The first COPY brings in just the two dependency files (package.json and package-lock.json) into the current directory (./, which is /app because of WORKDIR). Then RUN npm install executes a command while the image is being built, downloading every package the app needs into /app/node_modules. Only after that does the second COPY . . bring in the rest of your source code.
Why not just COPY . . once at the top and install after? Because of caching, which is the next lesson's whole topic. But the short version: Docker remembers each step, and only redoes a step if its inputs changed. Your dependencies change rarely. Your source code changes constantly. By copying package.json and installing before copying your code, Docker can reuse the cached install every time you tweak server.js. Flip the order and you reinstall every single package on every code change. Same result, wildly slower builds.
Order your COPY lines least-changing first
The instructions most likely to stay the same (base image, dependency install) go near the top. The ones that change constantly (your source code) go near the bottom. That single habit is the difference between a 1-second rebuild and a 60-second one. We'll dig into exactly why in the next lesson.
RUN vs CMD: build time vs start time
These two look similar and trip up nearly everyone at first. The difference is when they run.
RUN executes while you're building the image. It's a setup step: install packages, compile assets, create folders. Whatever RUN does gets baked into the image as a permanent layer. By the time the image is finished, npm install has already happened, and the packages are sitting inside the image.
CMD does nothing at build time. It just records the default command to run when someone starts a container from this image. It's the "press play" instruction, and it fires fresh every time the container launches.
So in our file, RUN npm install happens once, during the build, and its result is stored in the image. CMD ["node", "server.js"] happens later, every time you docker run the image, and it's what actually boots the server. Build steps versus start steps. Keep that line clear and Dockerfiles stop being confusing.
Quick check
When does the CMD instruction actually execute?
One more distinction you'll see: CMD vs ENTRYPOINT. In one line: ENTRYPOINT sets the fixed program the container always runs, while CMD supplies the default arguments you can override at docker run time. For most apps a single CMD is all you need.
EXPOSE: document the port
EXPOSE 3000Our server listens on port 3000, and EXPOSE 3000 declares that. Here's the honest truth most tutorials skip: EXPOSE doesn't actually open or publish anything. It's documentation, a note in the image that says "this app speaks on 3000." It tells the next person (and some tools) which port matters, but it does not make that port reachable from your machine.
To actually connect to the container you publish the port with -p at run time, which we'll do in a second. EXPOSE is the label on the box, and -p is opening the box. Putting both in is good practice, since the label tells everyone the right port to publish. Ports and volumes get a full lesson later in the series.
docker build: turn the recipe into an image
You've got server.js, a package.json, and a Dockerfile in one folder. Build the image:
docker build -t myapp .Read that command piece by piece. docker build is the verb. -t myapp tags the image with a name (myapp) so you can refer to it later instead of an unreadable hash. And the . at the end is the build context: the folder Docker should send to the builder and run COPY against. The dot means "this directory." Forget the dot and the build fails with "no such file or directory," because Docker needs to know which folder to build from.
Docker runs each instruction in order and prints its progress. You'll see it pull node:20-alpine, set up /app, copy the dependency files, run the install, copy your source, and finish. When it's done:
docker imagesYour myapp image shows up in the list, with its size and the time it was created. That's a real, self-contained image: Node, your dependencies, and your code, all in one bundle.
docker run: start a container from your image
The image is just sitting there. Start a container from it:
docker run -p 8080:3000 myappdocker run myapp starts a container from your image, which fires the CMD (node server.js), and you'll see Listening on port 3000 print in your terminal. The -p 8080:3000 part publishes the port: it maps port 8080 on your machine to port 3000 inside the container (the one we EXPOSEd). Left side is your machine, right side is the container.
Now open a browser to http://localhost:8080 (or run curl http://localhost:8080) and you'll get:
Hello from inside a containerThat request hit port 8080 on your machine, Docker forwarded it to port 3000 inside the container, your Node server answered. Your code, running in an image you built, reachable from your browser. Stop it with Ctrl+C.
One file you'll want next: .dockerignore
Notice COPY . . copies everything in your folder, including node_modules, .git, and any local junk you don't want in the image. The fix is a .dockerignore file that lists what to leave out, much like .gitignore. We cover it in the next lesson, but if you build now and your image feels bloated, that's why.
Recap and what's next
A Dockerfile is a recipe that turns your code into a runnable image. FROM picks a base image. WORKDIR sets the folder you build and run in. COPY brings files from your machine into the image. RUN executes setup commands at build time and bakes the result in. EXPOSE documents the port, and CMD sets the default command that runs each time a container starts. You wired those into a real Node app, ran docker build -t myapp . to assemble the image, and docker run -p 8080:3000 myapp to launch it and hit it from your browser. The one line to keep straight: RUN is build time, CMD is start time.
If any of the image-versus-container language still feels fuzzy, revisit Images vs containers. It's the foundation this lesson builds on. Next, we'll explain why the COPY-then-RUN ordering matters so much and how to make rebuilds nearly instant in Layers and caching. And when you want the full instruction reference, the official Dockerfile docs are the source of truth.

Written by
Rhythm Bhiwani
Engineer and relentless builder, happiest reverse-engineering hard problems until they click.
Enjoyed this?
Tap the heart to leave some love.
Be the first to react
Comments
Join the conversation.
Loading comments…